
UI Composer では、Scene、Dialog、Panel、ListPanelItem の4つのクラスをレイアウトすることが可能です。
この章では、これら4つをどのようなシナリオで利用するかについて順に説明していきます(図1)。
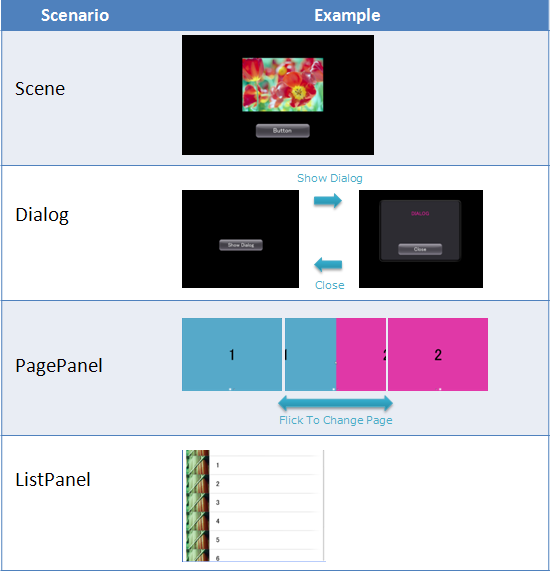
図1 4つのシナリオ
Sceneのレイアウトについて説明します。
Scene に ImageBox や Button を配置したシンプルな画面レイアウトを作成します(図2)。
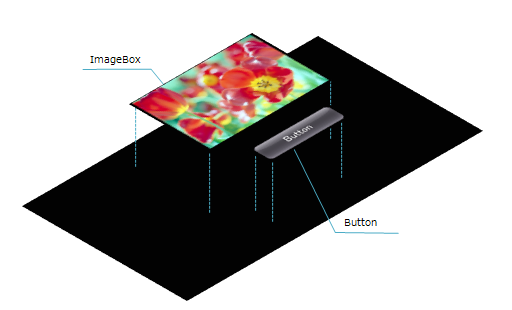
図2 Scene のレイアウト概要
まず、UI Composer で Scene を新規作成します(図3)。
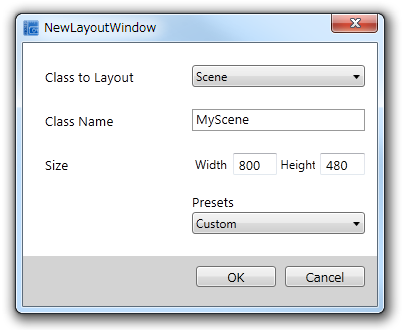
図3 Scene の新規作成
作成した Scene に ImageBox と Button を配置します(図4)。
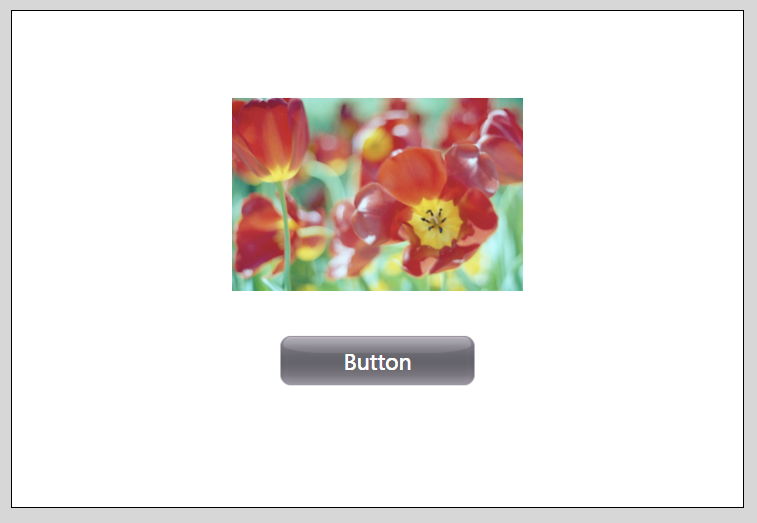
図4 Scene のレイアウト結果
この状態で Build すると 下記のようなコードが出力されます。
partial class MyScene
{
    ImageBox ImageBox_1;
    Button Button_1;

    private void InitializeWidget()
    {
        InitializeWidget(LayoutOrientation.Horizontal);
    }

    private void InitializeWidget(LayoutOrientation orientation)
    {
        ImageBox_1 = new ImageBox();
        ImageBox_1.Name = "ImageBox_1";
        Button_1 = new Button();
        Button_1.Name = "Button_1";

        // ImageBox_1
        ImageBox_1.Image = new ImageAsset("/Application/assets/photo05.png");

        // Button_1
        Button_1.TextColor = new UIColor(0f / 255f, 0f / 255f, 0f / 255f, 255f / 255f);
        Button_1.TextFont = new UIFont( FontAlias.System, 25, FontStyle.Regular);
        Button_1.BackgroundColor = new UIColor(255f / 255f, 255f / 255f, 255f / 255f, 255f / 255f);

        // Scene
        this.RootWidget.AddChildLast(ImageBox_1);
        this.RootWidget.AddChildLast(Button_1);

        SetWidgetLayout(orientation);

        UpdateLanguage();
    }

    private LayoutOrientation _currentLayoutOrientation;
    public void SetWidgetLayout(LayoutOrientation orientation)
    {
        switch (orientation)
        {

// --snip--

        default:
            this.DesignWidth = 854;
            this.DesignHeight = 480;

            ImageBox_1.SetPosition(212, 45);
            ImageBox_1.SetSize(429, 286);
            ImageBox_1.Anchors = Anchors.Top | Anchors.Height | Anchors.Left | Anchors.Width;
            ImageBox_1.Visible = true;

            Button_1.SetPosition(319, 374);
            Button_1.SetSize(214, 56);
            Button_1.Anchors = Anchors.Top | Anchors.Height | Anchors.Left | Anchors.Width;
            Button_1.Visible = true;

            break;
        }
        _currentLayoutOrientation = orientation;
    }

// --snip--

}
作成したレイアウトを使用する場合は、Program.cs の Main関数内に下記のように記述します。
public class AppMain
{

// --snip--

    public static void Initialize ()
    {
        // Set up the graphics system
        graphics = new GraphicsContext ();

        // Initialize UI Toolkit
        UISystem.Initialize(graphics);

        // Create scene
        var scene = new MyScene();
        // Set scene
        UISystem.SetScene(scene, null);
    }

// --snip--

}
この状態でビルド、実行することで、レイアウトした通りエミュレータ上で動作します(図5)。
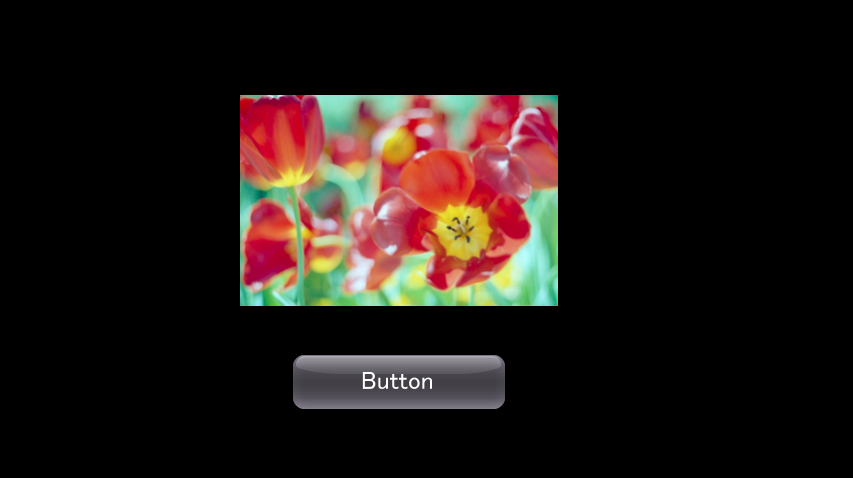
図5 エミュレーター上での実行結果
Dialog のレイアウトとその利用方法について説明します。
Scene に配置された Button を押すと、レイアウトした Dialog を表示する例を示します(図6)。
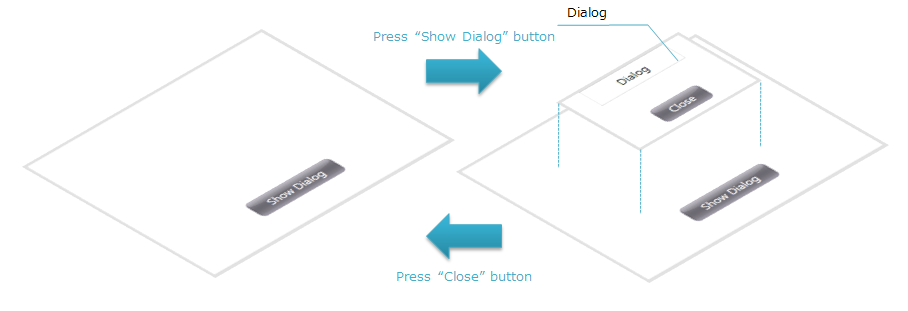
図6 Dialog 表示の例
前節と同様に、Scene と Dialog をそれぞれ作成します(図7)。
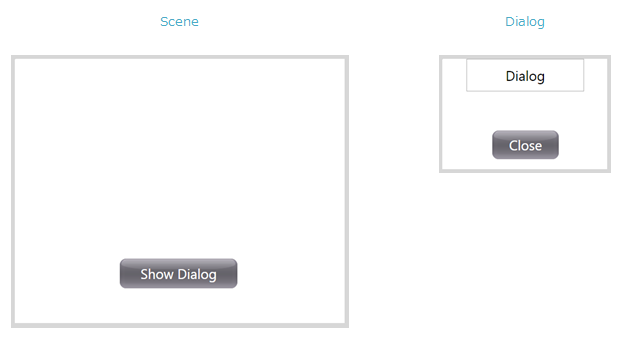
図7 Dialog のレイアウト結果
MyScene に配置した Button を押すと Dialog を表示するように、MyScene.cs に以下のように記述します。
MyScene に MyDialog を追加します。
public partial class MyScene : Scene
{
    static private MyDialog dialog;

    public MyScene()
    {
        InitializeWidget();

        dialog = new MyDialog();
    }
}
Button_1 に dialog を表示するためのイベントを追加します。
public partial class MyScene : Scene
{
    MyDialog dialog;

    public MyScene()
    {
        InitializeWidget();

        dialog = new MyDialog();

        Button_1.ButtonAction += HandleButton_1ButtonAction;
    }

    void HandleButton_1ButtonAction (object sender, TouchEventArgs e)
    {
        dialog.Show();
    }
}
MyDialog の Button についても同様にイベントを登録します。
public partial class MyDialog : Dialog
{
    public MyDialog()
        : base(null, null)
    {
        InitializeWidget();

        Button_1.ButtonAction += HandleButton_1ButtonAction;
    }

    void HandleButton_1ButtonAction (object sender, TouchEventArgs e)
    {
        this.Hide();
    }
}
前節同様に MyScene を表示させ、Buttonをタップすると Dialog が表示されます(図8)。
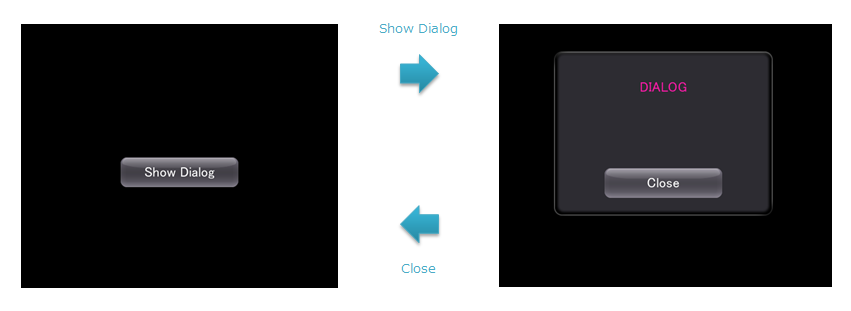
図8 エミュレータ上での実行結果
PagePanel を使用して複数の Panel を表示する例について説明します(図9)。
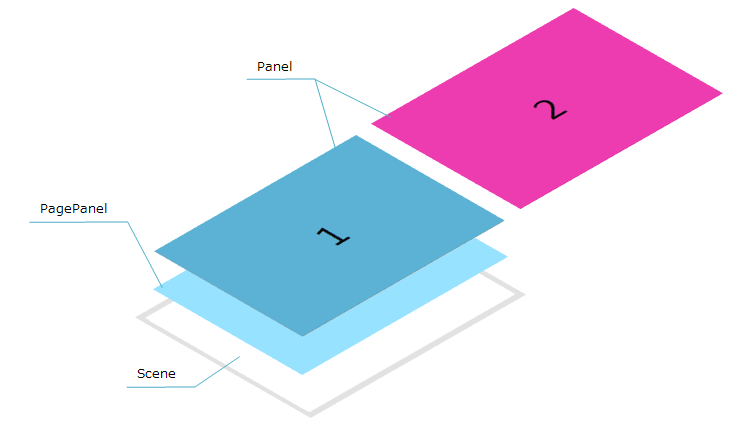
図9 PagePanel概要図
MyScene、MyPanel1、MyPanel2を作成します(図10)。
MyScene には PagePanel を配置します。
MyPanel1、MyPanel2は、PagePanel の大きさに合わせ新規作成します(図11)。

図10 PagePanel のレイアウト結果
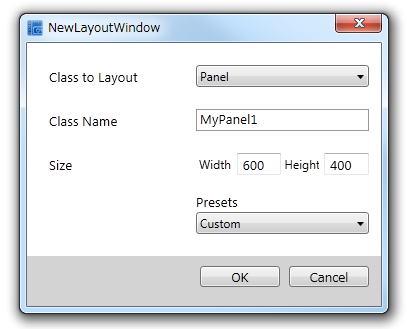
図11 Panel の新規作成
MyScene に配置した PagePanel に MyPanel1、MyPanel2 を設定します。PagePanel のプロパティウィンドウに作成した Panel を設定します。(図12)。
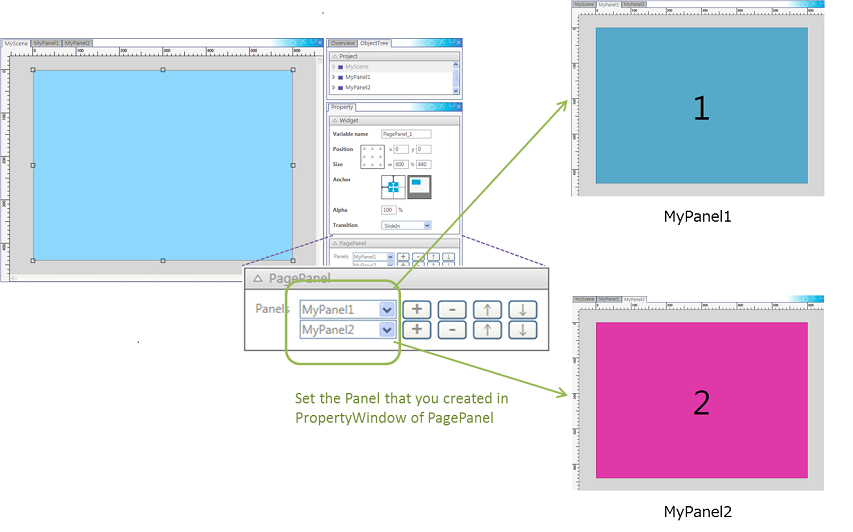
図12 作成した Panel の指定方法
MyScene.composer.cs で PagePanelで表示する MyPanel1、MyPanel2 が指定されます。
private void InitializeWidget()
{

// --snip--

    // PagePanel_1
    PagePanel_1.AddPageLast(new MyPanel1());
    PagePanel_1.AddPageLast(new MyPanel2());

}
ビルドし実行すると レイアウト通り PagePanel が動作します(図13)。
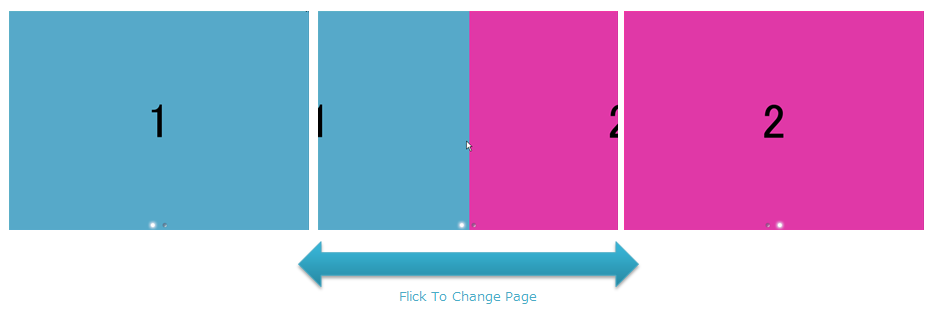
図13 エミュレーター上での実行結果
Listのレイアウトとその利用方法について説明します(図14)。
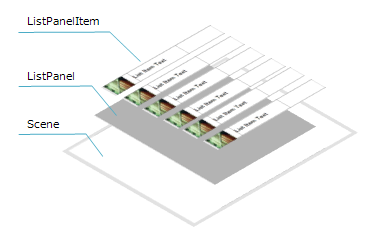
図14 ListPanel の概要図
前節の PagePanel 同様、MyScene に ListPanel を配置します。
ListPanel に配置する要素 MyListPanelItem を作成します(図15)。
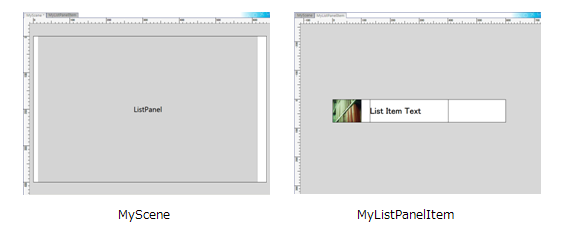
図15 List のレイアウト結果
ListPanel に作成した MyListPanelItem を設定します(図16)。
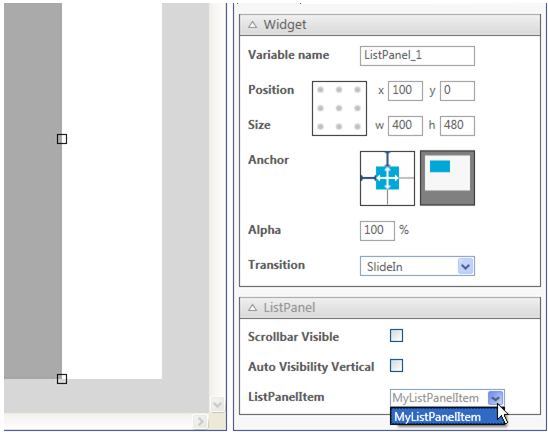
図16 作成した ListPanelItem の指定方法
MyScene.composer.cs で ListPanel_1 で表示する MyListPanelItem が指定されます。
private void InitializeWidget(LayoutOrientation orientation)
{

// --snip--

    // ListPanel_1
    ListPanel_1.ScrollBarVisibility = ScrollBarVisibility.Visible;
    ListPanel_1.SetListItemCreator(MyListPanelItem.Creator);

}
MyListPanelItem.composer.cs には Creator メソッドが自動生成されます。
partial class MyListPanelItem
{

// --snip--

    public static ListPanelItem Creator()
    {
        return new MyListPanelItem();
    }
}
MyListPanelItem の更新とListPanel_1のアイテム数を指定するために、MyScene.cs に以下のようなに記述します。 MyListPanelItem の更新内容に関する記述は、ListItemUpdater 内に追加します。ここでは、Label の文字列として数字を表示する例を示します。
public partial class MyScene : Scene
{
    public MyScene()
    {
        InitializeWidget();

        ListPanel_1.SetListItemUpdater(ListItemUpdater);
        ListPanel_1.Sections = new ListSectionCollection { new ListSection("Section", 10) };

    }

    void ListItemUpdater(ListPanelItem item)
    {
        Label label = null;
        foreach (var w in item.Children)
        {
            label = w as Label;
            if (label != null) break;
        }
        if (label != null)
        {
            label.Text = item.Index.ToString();
        }
    }
}
ビルドし実行すると レイアウト通り ListPanel が動作します(図17)。
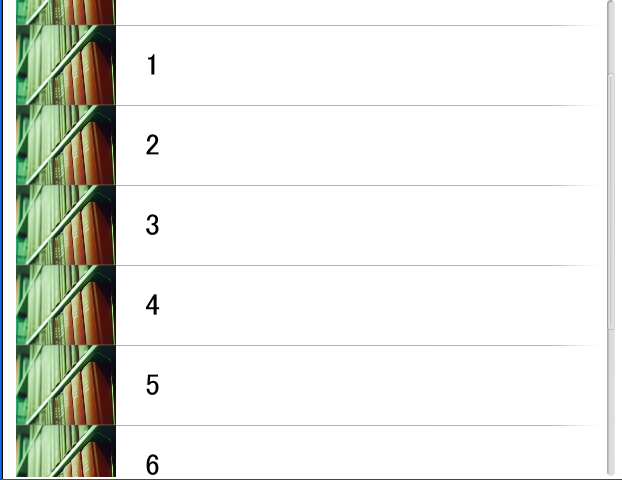
図17 エミュレーター上での実行結果