この文書では2Dシューティングゲームの完成まで説明します。
Contents
ではゲームに必要なキャラクターのクラスをどんどん実装していきましょう。
クラスの実装は星や自機の弾と同じ要領でおこなえば大丈夫です。
sample/Tutorial/Sample08_01/Sample08_01.slnを開いてください。
まずは敵のクラスです。
public class Enemy : GameActor
{
    static int idNum=0;

    float speed=4;
    Int32 cnt=0;

    public Enemy(GameFrameworkSample gs, string name, Texture2D textrue, Vector3 position) : base (gs, name)
    {
        Name = name + idNum.ToString();
        this.sprite = new SimpleSprite( gs.Graphics, textrue );
        this.sprite.Center.X = 0.5f;
        this.sprite.Center.Y = 0.5f;

        idNum++;

        this.sprite.Position = position;
    }

    public override void Update()
    {
        sprite.Position.Y += speed;

        if (sprite.Position.Y > gs.rectScreen.Height + sprite.Height )
        {
            this.Status = Actor.ActorStatus.Dead;//画面外にでたら死亡。
        }

        // 弾発射。
        if(cnt == 60)
        {
            GameActor player =(GameActor)gs.Root.Search("Player");

            Vector2 direction;
            direction.X= player.Sprite.Position.X - this.sprite.Position.X;
            direction.Y= player.Sprite.Position.Y - this.sprite.Position.Y;
            direction=direction.Normalize();

            gs.Root.Search("enemyBulletManager").AddChild(new EnemyBullet(gs, "enemyBullet", gs.textureEnemyBullet,
                new Vector3(this.sprite.Position.X,this.sprite.Position.Y, 0.5f), direction));
        }

        ++cnt;

        base.Update();
    }
}
出現から60フレーム経過したら、自機に向かって弾を発射するようにしています。
direction=direction.Normalize()で方向ベクトルを単位ベクトルにしています。
画面外に出たら死亡フラグを立てます。
次に敵弾のクラスです。
public class EnemyBullet : GameActor
{
    static int idNum=0;

    float speed=6;

    Vector3 trans;

    public EnemyBullet(GameFrameworkSample gs, string name, Texture2D textrue, Vector3 position, Vector2 direction) : base (gs, name)
    {
        Name = name + idNum.ToString();
        this.sprite = new SimpleSprite( gs.Graphics, textrue );
        this.sprite.Center.X = 0.5f;
        this.sprite.Center.Y = 0.5f;

        idNum++;

        this.trans.X=direction.X*speed;
        this.trans.Y=direction.Y*speed;
        this.trans.Z=0.0f;

        this.sprite.Position = position;
    }

    public override void Update()
    {
        sprite.Position += trans;

        if (sprite.Position.X < 0 -sprite.Width ||
            sprite.Position.Y < 0 -sprite.Height||
            gs.rectScreen.Width + sprite.Width < sprite.Position.X ||
            gs.rectScreen.Height + sprite.Height < sprite.Position.Y  )
        {
            this.Status = Actor.ActorStatus.Dead;
        }

        base.Update();
    }
}
引数の方向ベクトルに速度を乗算して移動ベクトルを算出し、Update()で毎フレーム移動ベクトルを加算しています。
画面外に出たら死亡フラグを立てます。
次は敵を出現させる管理クラスです。
public class EnemyCommander : GameActor
{
    public EnemyCommander(GameFrameworkSample gs, string name) : base (gs, name)    {}

    public override void Update()
    {
        if( gs.appCounter % 30 == 0)
        {
            Vector3 position;

            position.X = (int)(gs.rectScreen.Width * gs.rand.NextDouble());
            position.Y = 0.0f;
            position.Z = 0.2f;

            gs.Root.Search("enemyManager").AddChild(new Enemy(gs, "enemy", gs.textureEnemy, position));
        }

        base.Update();
    }
}
30フレームに一度、画面上方向から敵を出現させるようにしています。
あとはGameFrameworkSample.csで次のようにアクターツリーを構成します。

では実行してみましょう。

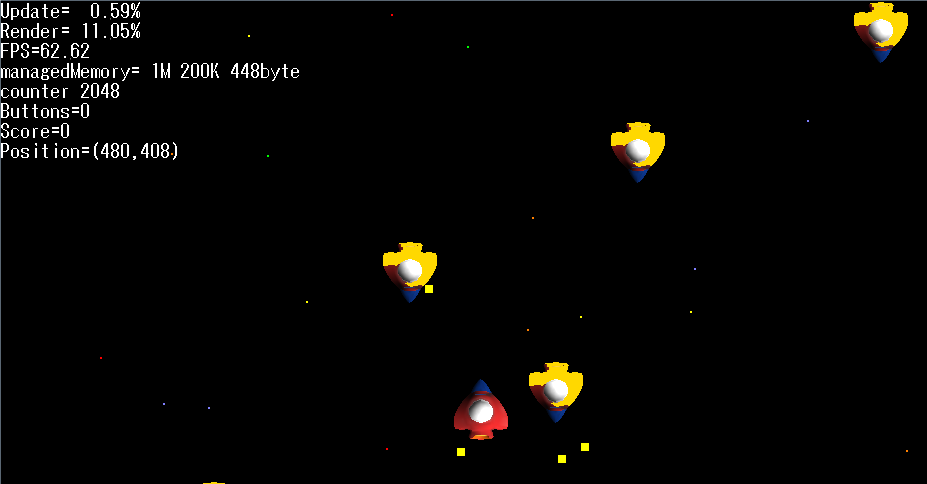
敵が画面上から出現し、自機に向けて弾を撃ってきます。
まだあたり判定をつけていないので弾が素通りしていますね。
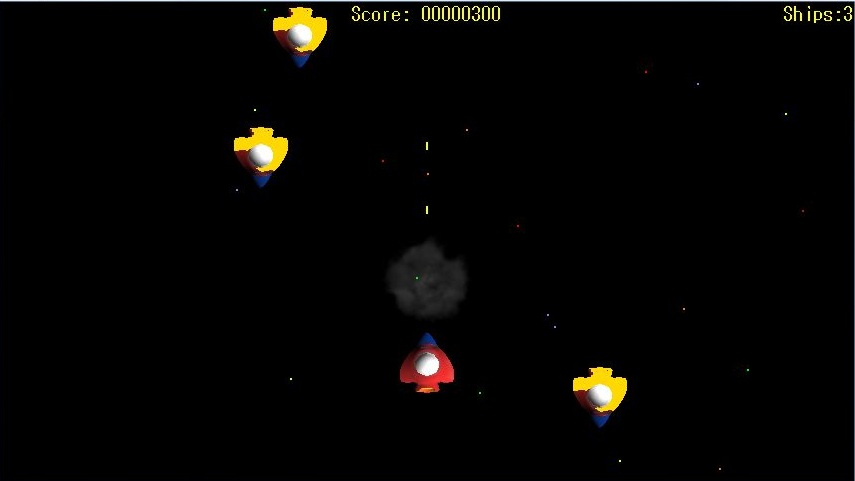
次はあたり判定をつけ、命中したら爆発エフェクトを出すようにしましょう。
sample/Tutorial/Sample08_01/Sample08_02.slnを開いてください。
sample/Tutorial/Sample08_02/CollisionCheck.cs
//@j あたり判定をおこなうクラス。
public class CollisionCheck : GameActor
{
    public CollisionCheck(GameFrameworkSample gs, string name) : base (gs, name){}

    public override void Update()
    {
        Player player =(Player)gs.Root.Search("Player");
        Actor bulletManager=gs.Root.Search("bulletManager");
        Actor enemyManager =gs.Root.Search("enemyManager");
        Actor bulletEnemyManager=gs.Root.Search("enemyBulletManager");
        Actor effectManager =gs.Root.Search("effectManager");

        //@j 弾と敵のあたり判定。
        foreach( Bullet bullet in  bulletManager.Children)
        {
            if(bullet.Status == Actor.ActorStatus.Action)
            {
                foreach( Enemy enemy in  enemyManager.Children)
                {
                    if(enemy.Status ==  Actor.ActorStatus.Action &&
                       Math.Abs(bullet.Sprite.Position.X -enemy.Sprite.Position.X ) < 30 &&
                        Math.Abs(bullet.Sprite.Position.Y -enemy.Sprite.Position.Y ) < 30
                            )
                    {
                        bullet.Status = Actor.ActorStatus.Dead;
                        enemy.Status = Actor.ActorStatus.Dead;
                        effectManager.AddChild(new Explosion(gs, "explosion", gs.textureExplosion,
                            new Vector3(enemy.Sprite.Position.X, enemy.Sprite.Position.Y, 0.3f)));

                        gs.Score += 100;
                        gs.soundPlayerExplosion.Play();
                    }
                }
            }
        }

        if(player.playerStatus== Player.PlayerStatus.Normal)
        {
            //@j 自機と敵のあたり判定。
            foreach( Enemy enemy in  enemyManager.Children)
            {
                if(enemy.Status ==  Actor.ActorStatus.Action &&
                   Math.Abs(player.Sprite.Position.X -enemy.Sprite.Position.X ) < 42 &&
                    Math.Abs(player.Sprite.Position.Y -enemy.Sprite.Position.Y ) < 42
                        )
                {

                    effectManager.AddChild(new Explosion(gs, "explosion", gs.textureExplosion,
                        new Vector3(player.Sprite.Position.X, player.Sprite.Position.Y, 0.3f)));

                    player.playerStatus = Player.PlayerStatus.Explosion;

                    gs.soundPlayerExplosion.Play();

                    gs.NumShips--;
                }
            }


            //@j 自機と敵弾のあたり判定。
            foreach( EnemyBullet enemyBullet in  bulletEnemyManager.Children)
            {
                if(enemyBullet.Status ==  Actor.ActorStatus.Action &&
                   Math.Abs(player.Sprite.Position.X -enemyBullet.Sprite.Position.X ) < 26 &&
                    Math.Abs(player.Sprite.Position.Y -enemyBullet.Sprite.Position.Y ) < 26
                        )
                {
                    enemyBullet.Status = Actor.ActorStatus.Dead;
                    effectManager.AddChild(new Explosion(gs, "explosion", gs.textureExplosion,
                        new Vector3(player.Sprite.Position.X, player.Sprite.Position.Y, 0.3f)));

                    player.playerStatus = Player.PlayerStatus.Explosion;
                    gs.soundPlayerExplosion.Play();
                    gs.NumShips--;
                }
            }
        }

        base.Update();
    }
}
あたり判定を行う各アクターのManagerクラスをアクターツリーの中から検索し、foreachでそれぞれの座標をもとに命中判定をおこなっています。
Managerクラスでツリー状に管理しておくと、あたり判定を行わなくてよいアクター(星、爆発エフェクト)を始めから除外できるので、処理効率がよいといえるでしょう。
命中判定が真ならそのアクターに死亡フラグを立て、爆発エフェクトを発生させます。
爆発エフェクトの発生も、他と同じ要領で行えばよいでしょう。
ところで、自機が爆発したときやその後の無敵時間のときは、あたり判定を行う必要がありません。
そのためPlayerの状態を表す変数を実装しておき、処理の場合分けを行いましょう。
sample/Tutorial/Sample08_02/Player.cs
public enum PlayerStatus
{
    Normal,
    Explosion,
    Invincible,
    GameOver,
};

public PlayerStatus playerStatus;
あとはあたり判定時にplayerStatusを見て、処理を行うとよいでしょう。
あとは、簡単なオープニング画面とゲームオーバー画面、点数表示をつくっておきましょう。
ここではゲームの進行を管理するクラスをつくります。
sample/Tutorial/Sample08_02/GameManager.cs
public class GameManager : GameActor
{
    Int32 cnt=0;

    SimpleSprite spriteTitle;
    SimpleSprite spritePressStart;
    SimpleSprite spriteGameOver;

    public GameManager(GameFrameworkSample gs, string name) : base (gs, name)
    {
        spriteTitle=new SimpleSprite(gs.Graphics, gs.textureTitle);
        spriteTitle.Position.X = gs.rectScreen.Width/2-gs.textureTitle.Width/2;
        spriteTitle.Position.Y = gs.rectScreen.Height/2-gs.textureTitle.Height;

        spritePressStart=new SimpleSprite(gs.Graphics, gs.texturePressStart);
        spritePressStart.Position.X = gs.rectScreen.Width/2-gs.texturePressStart.Width/2;
        spritePressStart.Position.Y = gs.rectScreen.Height/2+gs.texturePressStart.Height;

        spriteGameOver=new SimpleSprite(gs.Graphics, gs.textureGameOver);
        spriteGameOver.Position.X = gs.rectScreen.Width/2-gs.textureGameOver.Width/2;
        spriteGameOver.Position.Y = gs.rectScreen.Height/2-gs.textureGameOver.Height;
    }

    public override void Update()
    {
        gs.debugStringScore.Clear();
        gs.debugStringShip.Clear();

        string str = String.Format("Score: {0:d8}", gs.Score);
        gs.debugStringScore.SetPosition(new Vector3( gs.rectScreen.Width/2-(str.Length*10/2), 2, 0));
        gs.debugStringScore.WriteLine(str);

        str = String.Format("Ships:{0}", gs.NumShips);
        gs.debugStringShip.SetPosition(new Vector3( gs.rectScreen.Width-(str.Length*10), 2, 0));
        gs.debugStringShip.WriteLine(str);

        switch(gs.Step)
        {
        case GameFrameworkSample.StepType.Opening:
            gs.debugString.WriteLine("Opening");

            if((gs.PadData.ButtonsDown & GamePadButtons.Start) != 0  )
            {
                Player player =(Player)gs.Root.Search("Player");
                player.Status = Actor.ActorStatus.Action;
                player.Initilize();

                gs.GameCounter=0;
                gs.NumShips=3;
                gs.Score=0;
                gs.soundPlayerButton.Play();
                gs.bgmPlayer.Play();
                gs.Step= GameFrameworkSample.StepType.GamePlay;
            }

            break;
        case GameFrameworkSample.StepType.GamePlay:
            gs.debugString.WriteLine("GamePlay");

            //@j 残機が0になったらゲームオーバーへ。
            //@e Game over when player stock falls to zero.
            if(gs.NumShips <= 0)
            {
                gs.Step= GameFrameworkSample.StepType.GameOver;
                gs.bgmPlayer.Stop();
                cnt=0;
            }

            ++gs.GameCounter;

            break;
        case GameFrameworkSample.StepType.GameOver:
            gs.debugString.WriteLine("GameOver");

            if((gs.PadData.ButtonsDown & GamePadButtons.Start) != 0 || ++cnt > 300)
            {
                gs.Step= GameFrameworkSample.StepType.Opening;
                System.GC.Collect(2);
            }

            break;
        default:
            throw new Exception("default in StepType.");

        }

        base.Update();
    }

    public override void Render ()
    {
        gs.debugStringScore.Render();
        gs.debugStringShip.Render();

        switch(gs.Step)
        {
        case GameFrameworkSample.StepType.Opening:
            spriteTitle.Render();
            spritePressStart.Render();
            break;
        case GameFrameworkSample.StepType.GamePlay:

            break;
        case GameFrameworkSample.StepType.GameOver:
            spriteGameOver.Render();
            break;
        default:
            throw new Exception("default in StepType.");

        }

        base.Render ();
    }
}
GameManager クラスでは、以下の流れでゲームを進行させます。
- オープニング画面で、ボタンを押してゲーム開始。
- ゲーム中、残機が0になったらゲームオーバー。
- ゲームオーバー画面で一定時間経過、もしくはボタンが押されたら、再びオープニング画面へ。
ゲームオーバー画面からオープニング画面に移行するとき、System.GC.Collect(2)でガベージコレクションを強制的に呼び出し、メモリを回収しています。画面が遷移する場所ならガベージコレクションによる処理落ちが発生してもそれほど気になりません。また、ここで呼び出しておくことでプレイ中のガベージコレクションの発生を低減させることができます。
アクターツリーの完成形は以下のようなイメージになります。

ようやくゲームの完成です。F5を押して実行してみてください。

sample/Tutorial/Sample08_02 は、app.xmlにマスターパッケージを作成するための設定がなされています。マスターパッケージを作成するときの参考にしてみてください。
シンプルなゲームですが、ゲームの進行に必要な構造はひと通りそろっているので、あとは好みに応じてどんどん改造していくとよいでしょう。