この文書ではスプライトの効率的な描画の方法について説明します。
Contents
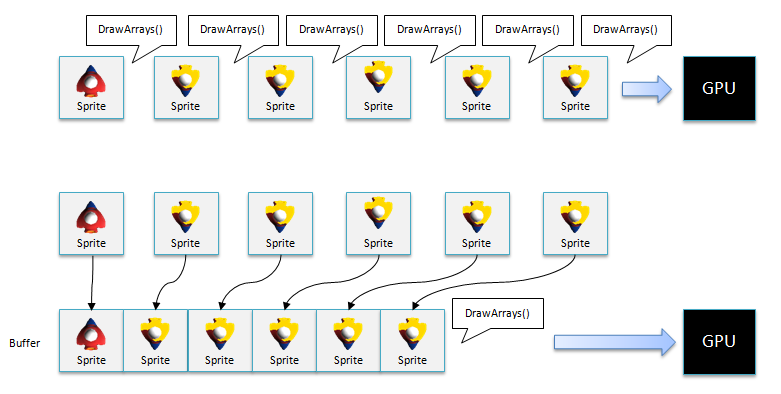
各スプライトの描画ごとにDrawArrays()を呼び出すと、描画ステートの切り替えに多くの処理時間がかかるため、GPUが効率よく描画処理を行えません。
対策として連続した頂点バッファを用意しておき、そこにスプライトのデータを配置してからDrawArrays()を呼び出すようにします。そうすればGPUが連続して処理を行うことができるため、効率的に描画が行えます。

図1 連続した頂点バッファにデータを配置したあとで、DrawArrays()を呼び出す。
複数のテクスチャをツールで一体化しておけば、テクスチャごとにSetTexture()で切り替えをおこなわなくて済み、効率的に描画処理が行えます。
テクスチャ一体化ツールの使い方と運用方法
ここではテクスチャ一体化ツール UnifyTexture.exe の使い方とプログラム側での運用方法を説明します。
UnifyTexture.exe概要
※ %SCE_PSM_SDK% は環境変数です。 デフォルトでインストールした場合、Windows 7/8 64bitなら C:/Program Files (x86)/SCE/PSM、Windows 7/8 32bitならC:/Program Files/SCE/PSM です。
UnifyTexture.exeのオプション
- -o,--output [name] : 出力ファイル名。
- -p,--pow : 出力される画像ファイルの大きさを2の乗数倍にあわせます。
- -m,--margin [number] : 画像ファイル間の間隔。デフォルトで1が指定されています。
- -r,--red_line : 画像ファイル境界線に赤い線を引く。テスト用。
使い方
コンソール画面で次のように入力してください。
"%SCE_PSM_SDK%/tools/UnifyTexture.exe" --output image/unified_texture image/BrackSmoke.png image/Bullet.png image/Enemy.png image/EnemyBullet.png image/GameOver.png image/GraySmoke.png image/Player.png実行例をsample/Tutorial/Sample09_01/unify_texture.batに記述しておきましたので、参考にしてみてください。
成功すると、一体化されたテクスチャと、テクスチャ内での配置位置を記したxmlファイルが出力されます。

図2 テクスチャの一体化と生成される2つのファイル
以下はxmlファイルの内容です。
<?xml version="1.0" encoding="utf-8"?>
<root version="1.0">
  <info w="512" h="512" />
  <textures>
    <texture filename="image/map_spaceA.png" x="0" y="0" w="256" h="351" />
    <texture filename="image/background.png" x="256" y="0" w="192" h="128" />
    <texture filename="image/boss.png" x="0" y="351" w="296" h="80" />
    <texture filename="image/SimpleShooting.png" x="0" y="431" w="373" h="48" />
    <texture filename="image/GameOver.png" x="256" y="128" w="248" h="41" />
    <texture filename="image/GraySmoke.png" x="256" y="169" w="64" h="64" />
    <texture filename="image/Enemy.png" x="320" y="169" w="64" h="64" />
    <texture filename="image/Player.png" x="256" y="233" w="64" h="64" />
    <texture filename="image/PressStart.png" x="320" y="233" w="170" h="23" />
    <texture filename="image/bullet_green.png" x="448" y="0" w="32" h="48" />
    <texture filename="image/myship.png" x="448" y="48" w="32" h="32" />
    <texture filename="image/particle.png" x="448" y="80" w="32" h="32" />
    <texture filename="image/BrackSmoke.png" x="256" y="297" w="32" h="32" />
    <texture filename="image/bullet_red.png" x="480" y="0" w="16" h="16" />
    <texture filename="image/mybullet.png" x="496" y="0" w="8" h="8" />
    <texture filename="image/EnemyBullet.png" x="480" y="16" w="8" h="8" />
    <texture filename="image/Bullet.png" x="488" y="16" w="2" h="8" />
    <texture filename="image/Star.png" x="480" y="24" w="2" h="2" />
  </textures>
</root>
プログラム側での処理手順
次に、一体化したテクスチャをプログラム側で利用する手順を説明します。
Sample09_01.slnを開いてください。
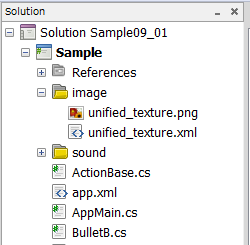
- まず生成されたunified_texture.pngとunified_texture.xmlをプロジェクトに追加します。
登録後、ビルドアクションに [Content] を指定してください。

図3 unified_texture.pngとunified_texture.xmlをプロジェクトに登録する
※ 一体化テクスチャを追加すれば、個別のテクスチャはプロジェクトから削除しても構いません。
- unified_texture.xmlファイルを メソッド UnifiedTexture.GetDictionaryTextureInfo() で初期化します。
それぞれのテクスチャの情報をUnifiedTextureInfoに格納しています。ここでは、ファイル名で各テクスチャにアクセスできるようDictionaryクラスを利用して管理しています。
テクスチャは以前と同じようにnew Texture2D()で作成します。
dicTextureInfo = UnifiedTexture.GetDictionaryTextureInfo("/Application/image/unified_texture.xml");
textureUnified=new Texture2D("/Application/image/unified_texture.png", false);
テクスチャの情報にアクセスするには dicTextureInfo["image/Player.png"] ようにおこないます。なお、SpriteBクラスを利用すればUnifiedTextureInfoの情報をそのまま利用できます。
UnifiedTextureInfo textureInfo=dicTextureInfo["image/Player.png"]
Console.WriteLine("w="+textureInfo.w);
Console.WriteLine("h="+textureInfo.h);
spriteB = new SpriteB(textureInfo);
あとは描画時に SetTexture() で一体化テクスチャを指定して描画を実行します。
graphics.SetTexture(0, this.textureUnified);
spriteB.Render();
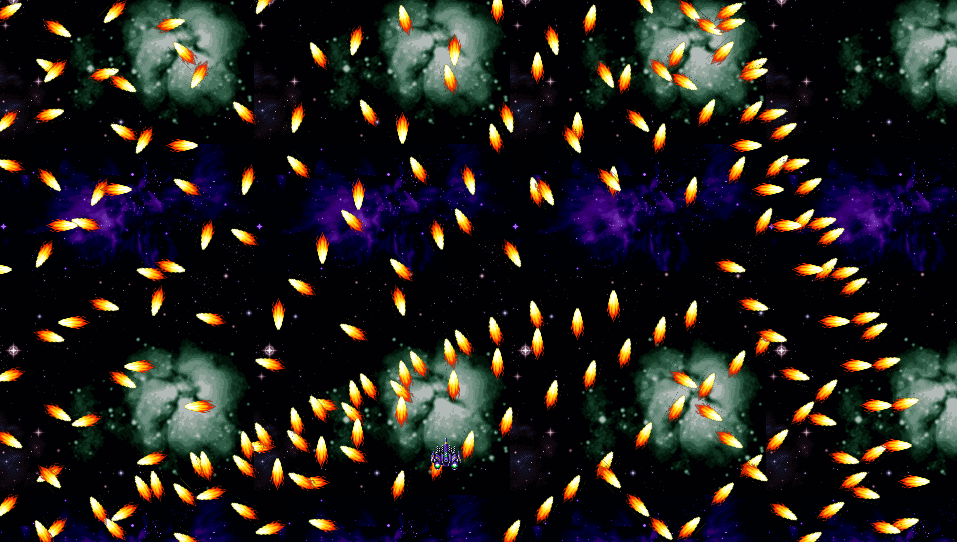
Sample09_01は上記の各ヒントを実装した例です。参考にしてみてください。

図4 Sample09_01