This document provides an explanation regarding efficient sprite rendering methods.
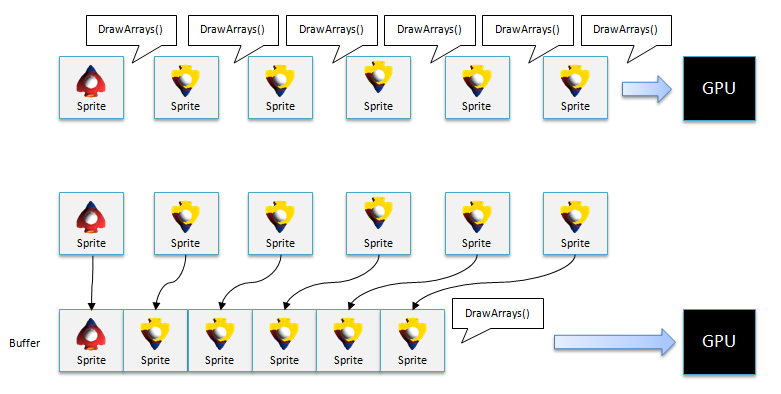
When DrawArrays() is called for each rendering of every sprite, the GPU cannot perform rendering processing efficiently because the processing takes time with many render state switches.
As a countermeasure, a sequence of vertex buffers are provided, allowing sprite data to be placed in them before DrawArrays() is called. By doing this, the GPU can perform processing consecutively and render efficiently.

Figure 1 Calling DrawArrays() After Placing Data in a Sequence of Buffers
If multiple textures are unified with a tool, effective render processing will be possible without needing to perform switching with SetTexture() for every texture.
Texture unifying tool usage and operation
This is an explanation of the UnifyTexture.exe texture unifying tool usage and operation in programs.
UnifyTexture.exe overview
Note: %SCE_PSM_SDK% is an environment variable. When installed by default, it will be C:/Program Files (x86)/SCE/PSM on Windows 7/8 64bit and C:/Program Files/SCE/PSM on Windows 7/8 32bit.
UnifyTexture.exe options
- -o,--output [name] : Output filename.
- -p,--pow : Enlarge output image file by a power of two.
- -m,--margin [number] : Margin between output files. 1 is specified by default.
- -r,--red_line : Draw a red line along the border of the image file. For testing.
Usage
In the console screen, enter code similar to the following.
"%SCE_PSM_SDK%/tools/UnifyTexture.exe" --output image/unified_texture image/BrackSmoke.png image/Bullet.png image/Enemy.png image/EnemyBullet.png image/GameOver.png image/GraySmoke.png image/Player.pngRefer to the execution example in sample/Tutorial/Sample09_01/unify_texture.bat.
When successful, the unified texture and an xml file containing the location information for the textures inside the unified texture will be output.

Figure 2 Texture Unifying and the Generation of Two Files
The following is the content of the xml file.
<?xml version="1.0" encoding="utf-8"?>
<root version="1.0">
  <info w="512" h="512" />
  <textures>
    <texture filename="image/map_spaceA.png" x="0" y="0" w="256" h="351" />
    <texture filename="image/background.png" x="256" y="0" w="192" h="128" />
    <texture filename="image/boss.png" x="0" y="351" w="296" h="80" />
    <texture filename="image/SimpleShooting.png" x="0" y="431" w="373" h="48" />
    <texture filename="image/GameOver.png" x="256" y="128" w="248" h="41" />
    <texture filename="image/GraySmoke.png" x="256" y="169" w="64" h="64" />
    <texture filename="image/Enemy.png" x="320" y="169" w="64" h="64" />
    <texture filename="image/Player.png" x="256" y="233" w="64" h="64" />
    <texture filename="image/PressStart.png" x="320" y="233" w="170" h="23" />
    <texture filename="image/bullet_green.png" x="448" y="0" w="32" h="48" />
    <texture filename="image/myship.png" x="448" y="48" w="32" h="32" />
    <texture filename="image/particle.png" x="448" y="80" w="32" h="32" />
    <texture filename="image/BrackSmoke.png" x="256" y="297" w="32" h="32" />
    <texture filename="image/bullet_red.png" x="480" y="0" w="16" h="16" />
    <texture filename="image/mybullet.png" x="496" y="0" w="8" h="8" />
    <texture filename="image/EnemyBullet.png" x="480" y="16" w="8" h="8" />
    <texture filename="image/Bullet.png" x="488" y="16" w="2" h="8" />
    <texture filename="image/Star.png" x="480" y="24" w="2" h="2" />
  </textures>
</root>
Procedure for programs
Next, an explanation of the procedure for using the unified texture in programs.
Open Sample09_01.sln.
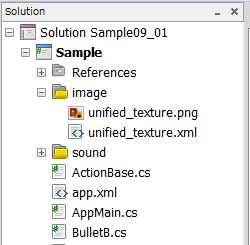
- First, register the generated unified_texture.png and unified_texture.xml files in the project.
After registration, specify [Content] for the build action.

Figure 3 Registering unified_texture.png and unified_texture.xml in a Project
Note: After adding a unified texture, the individual textures can be deleted from the project.
- Initialize the unified_texture.xml file with the UnifiedTexture.GetDictionaryTextureInfo() method.
The information of each texture will be stored in UnifiedTextureInfo. Here, the Dictionary class will be used for management so that each texture can be accessed by filename.
Textures are created similarly to before with new Texture2D().
dicTextureInfo = UnifiedTexture.GetDictionaryTextureInfo("/Application/image/unified_texture.xml");
textureUnified=new Texture2D("/Application/image/unified_texture.png", false);
Access texture information with code such as dicTextureInfo["image/Player.png"]. Note that if the SpriteB class is used, the UnifiedTextureInfo information can be used as-is.
UnifiedTextureInfo textureInfo=dicTextureInfo["image/Player.png"]
Console.WriteLine("w="+textureInfo.w);
Console.WriteLine("h="+textureInfo.h);
spriteB = new SpriteB(textureInfo);
Next, specify the unified texture for rendering with SetTexture(), then execute the rendering.
graphics.SetTexture(0, this.textureUnified);
spriteB.Render();
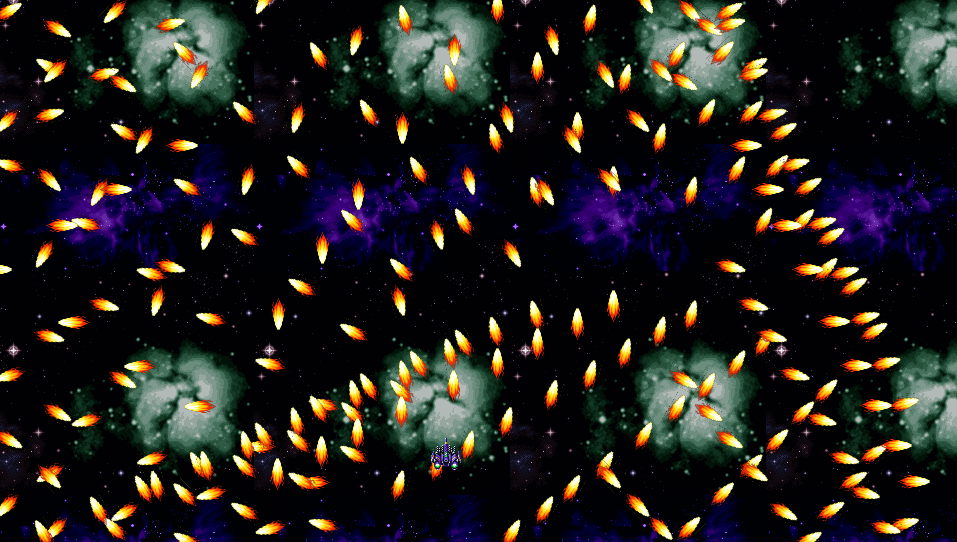
Sample09_01 is an example that implements tips for this procedure. Refer to it as required.

Figure 4 Sample09_01